User Guide to Add Printer in Windows 7
Wondering how to Add Printer in Windows 7? Looking for the simple steps to set up the printer in a Windows computer? Well, if your answer to these questions is yes then this blog is only for you. This blog will guide you to add the printer in the Windows 7 operating system. You can set up your printer on the Windows 7 operating system computer very easily. You just need to read the blog till the end and follow the step-by-step guidelines to add your printer in Windows 7 operating system. Let’s get started.
Instructions to add the printer in Windows 7 operating system
Go through the below steps to add your printer in Windows 7 operating system manually:
Step 1: First of all, turn on your computer and click on the start button. Then go to the control panel and double-click on the “devices and printers” option.
Step 2: Then, go to the menu option and tap on the “add a printer” option.
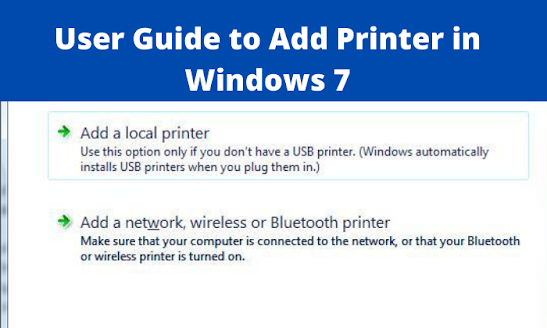
Step 3: In the next step, click on the “add a local printer” button from the drop-down menu.
Step 4: Further, you need to select the LPT port and then hit on the next button.
Step 5: Now, select the appropriate drivers for your printer from the list. If the required drivers are not available then you need to click on the Windows update button. Once you are done with the Windows 7 update installation, again look for the compatible drivers for your printer.
Alternative method to add the printer in Windows 7 operating system
Follow the below steps to add a shared printer in Windows 7 operating system:
Step 1: First and foremost, turn on your computer and then click on the start button. Then, you need to click on the control panel and then double-click on the “devices and printers” option.
Step 2: After that, select the “add a printer” option from the drop-down menu.
Step 3: From the next menu, click on the “add a local printer” button.
Step 4: Now, you need to click on the “create a new port” button and then select the “local port button” from the existing menu list.
Step 5: Then, enter the port name and type the address in the box and hit on the next button.
Step 6: Thereafter, you need to select the required drivers for your printer from the list. If you can find the appropriate drivers from the list then, click on the Windows update button in order to update Windows 7 operating system. Once you are done with updating the Windows 7, then again search for the appropriate drivers for your printer.
Hopefully, by following the above-mentioned steps you can Add Printer in Windows 7 without any difficulty. Still, if you are facing any issue with the setup procedure then feel free to contact our technical experts.

Comments
Post a Comment